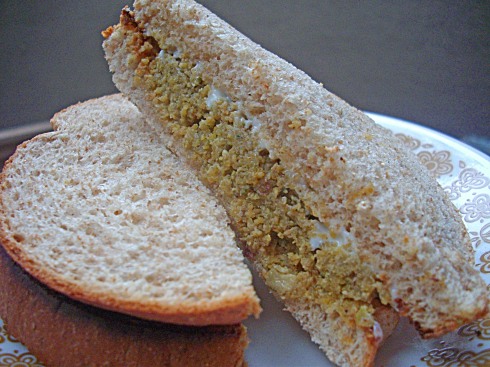
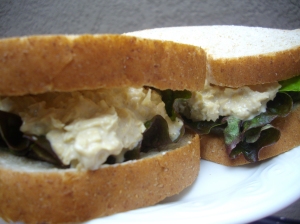
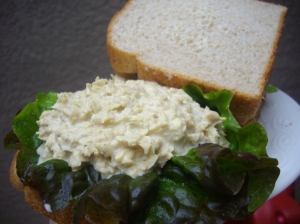
Today I bring you two of my favourite vegan sandwich fillings: Chickpeagg Salad and Pepitawurst.

I bragged about the Chickpeagg Salad sandwiches yesterday, and of course IMMEDIATELY Saby DEMANDED the recipe from me, so I decided to toy with her a bit and wait a full 24 hours before posting it online, because I like to play with her emotions a little bit. But it’s not nice to keep her in perpetual anticipation so here we go.

Chickpeagg Salad Sandwich Filling

1 (14oz) can of chickpeas, drained and rinsed

1/3 cup vegan mayo (Vegenaise is the undisputed champ-een of all vegan mayos)

1/4 cup chopped pickles – whatever your favourite kind is (once I used pickled pearl onions and OMG; but usually I just use the dills I keep on hand)

2 tbsp nutritional yeast

1/2 tsp salt (if you have Kala Namak or Indian “Black Salt” – really it’s pink – use that. Stinky egg-like goodness)

dash of apple cider vinegar

dash of liquid sweetener

pinch of tumeric

grinding of black pepper

Place all ingredients in your blender or food processor and puree until uncommonly smooth. Taste and adjust seasonings to your liking. Makes enough for like 8 sandwiches.
If you want this filling to be even more egg-like, try tossing some big chunks of firm silken or smoked tofu into it post-processing and stirring those around. They recreate cooked egg-whites very nicely.
Also yummy as a dip, or used as a filling for vegan “deviled eggs”.


Pepitawurst

I’m a little ashamed to admit this, but when I was a kid, I was a huge fan of processed meat products. Deviled ham and liverwurst especially. Of course now that I’m older, wiser and vegan the idea of eating the pureed flesh of another once-living sentient creature gives me the heaves, no matter how nicely spiced it may be. So when I developed this recipe for a baked pumpkin seed (pepita) spread (based on a sunflower pate recipe), I realized that it recreated that rich, spicy, salty sensation in my mouth every time I put it into a sandwich with mustard and mayo (just like the liverwurst sandwiches my mother used to send with me to school – and yes, I got teased about my lunches a lot…)

So, if you’re of German ancestry or just remember enjoying a sandwich spread thick with processed meat paste but don’t want to eat processed meat paste anymore, give this recipe a whirl and lemme know what you think.

1 1/3 cups finely ground raw pumpkin seeds

1/3 cup cornmeal

1/2 cup nutritional yeast

1 tbsp fresh parsley, finely chopped

1 tsp each dried sage, rosemary, thyme, paprika, black pepper, onion powder and marjoram

1 tsp sea salt

1/2 tsp each nutmeg & allspice

1 1/2 cups warm water

1/3 cup olive oil

2 tbsp soy sauce

1 tbsp your favourite mustard

Preheat your oven to 325 F. Oil a 8″ or 9″ baking pan (a pie plate or cake pan is great). Using a whisk, blend the dry ingredients together in a mixing bowl until well combined. Add the wet ingredients and mix thoroughly. Pour into the prepared pan and bake for 25 – 30 minutes or until the edges look firm but the center still seems a bit soft. Let cool on a wire rack, then transfer to a food processor or blender and whiz until it’s smooth. Store in an airtight container in your fridge for up to 7 days. Great in sandwiches or on crackers.

And today, just because, here’s a bonus photo of one of my kitties, sitting pretty in a basket full of random swimming pool junk, hiding out from the rain on our deck.

You know that person…maybe you work with them, or they show up at some of the same parties you go to, or they’re your aunt or something…who, when they find out you’re vegan, says, “Cool. I’m basically a vegan, except I eat some fish.” Well, instead of getting all bent out of shape and looking around for the nearest carrot to stuff in their maw while shouting, “You can’t be a vegan if you eat fish, dumbass!” slap one of these puppies on their plate and be done with it.

All of the phlavour, none of the deadness

That’s right! It’s M.C. Fauxlet-o-Phish all up in this hizzy. And I can tell you this, because I have been vegan for over a dozen years now and there’s no chance of me going back, but once upon a time I had a two-a-week filet-o-fish habit and as far as vegan reproductions go, this one beats all previous incarnations. Forget slabs of tofu marinating for hours in Old Bay-laced lemon & dill water, they won’t hold a candle to this baby.

The inspiration for these fauxlets came in the midst of a yuba frenzy the week before last. I’d run out to the local Asian supermarket to stock up on items from the Vegetarian section of their freezers and when I got my yuba home and pan fried it I realized, for the first time, that it had that flaky, juicy, tender texture I’d been searching for. I’ve longed to create a vegan fish replacement that actually fish-like. Don’t get me wrong – chickpeas, zucchini, artichoke hearts, and tofu have served me well over the years; you can get the flavour pretty accurate using the right combo of sea vegetables and spices, but the texture is always an issue. So as soon as I finished scarfing back my yuba in black bean & garlic sauce, I got online and typed yuba + “vegan fish” into Google. This was the number 1 result. Fantastic! (By the way, although she doesn’t seem to be updating it any more, there’re a lots of great recipes on there so be sure to poke around.)

I fully intend to try her version but I knew from the get-go that I wanted a less Asian-style filet, so in true Duchess fashion I jumped right in with my own flavour ideas and just used her method as a template for my recipe.

It's yuba, booba

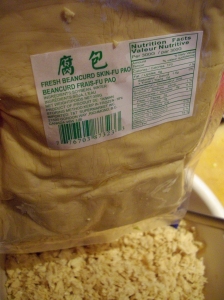
So this is the package of yuba. It comes frozen at my local shop but yours might have it fresh, or even in dried form, in which case you’ll want to soak it in some hot water until it’s nice and soft and pliable. I defrosted mine overnight in the fridge, and then I pulsed it into a fine flaked texture and put it in a bowl with a bunch of seasonings and some starch to bind it all together.

After that, I used some extra yuba skins that I’d set aside to line my steamer baskets with. I lightly oiled the baskets first, unfolded the yuba packets, and then draped them lovingly all over the bottom. Then I scooped my flavoured yuba mixture on these in an even layer, pressing to make it nice and compact. After that, it was time to steam it for about 45 minutes.

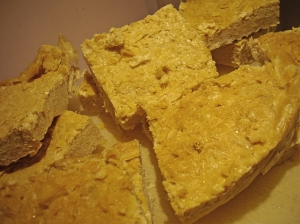
When it was finished cooking, I popped it in the freezer, still in the steamer baskets, to rest overnight. I was worried that because I hadn’t wrapped the phish mixture up completely it wasn’t going to hold together very well when I wanted to cut it into single servings and fry it. This fear was unfounded, as it turned out. The next day, near dinner time, I pulled the baskets out of the freezer and ran a knife through the steamed phish, cutting it into 8 squares (well, not exact squares since the steamer is an oval shape, but you get the gist).

It was at this moment I had to decide what I was going to do with these finished “filets”. So many possibilities! Baked with some dijon? Beer battered and deep fried with chips? Pecan crust and a “hollandaise” sauce? That was when the kids said they wanted to try fish burgers, and I remembered how, long long ago, I used to have a McDonalds Filet o Fish habit. It was decided.

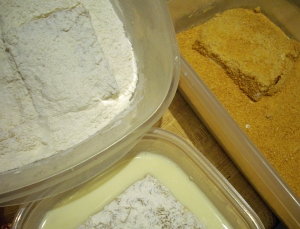
Dredged.

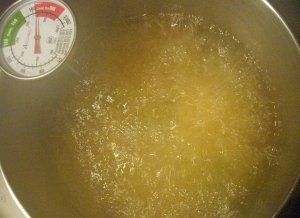
Fryin.

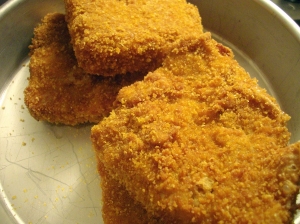
Finished.

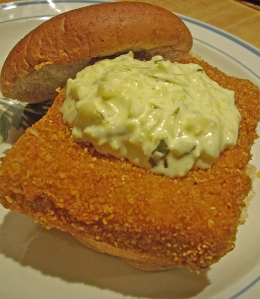
Loaded onto a bun with a quick homemade Vegenaise-based dill tartar sauce and a heapin’ helpin’ of Daiya cheddar, and we were in Fauxlet-o-Phish heaven.  Look, I even cut mine in half so you could see the different textures!

My daughter took one bite and refused to eat any more. She’s been vegan her whole life from conception onwards and the very idea of eating anything out of the ocean gives her a serious case of the squicks. She’s fine with other mock-meats but for some reason can’t take the seafoody taste of vegan phish. Never has, never will. My son and husband, however, went completely bonkers over these, helping themselves to seconds and asking me to please write down the recipe so I can do this again some day. I’m writing it here, in case any of you want to give it a shot.

I made a double recipe because I like to freeze extras to have on hand. You might like to do that too.

Phaux Phish, Bish

Yields 8 filets

600 grams (about 1 1/2 lbs) of fresh yuba + 300 grams if you are going to line your steamer with extra sheets (you can just use parchment or lightly oiled foil if you like).

2 tbsp vegetable oil

2 tbsp nutritional yeast

2 tsp paprika

2 tsp dill

2 tsp onion powder

1 tsp garlic powder

2 tsp sea salt

1/2 tsp kelp powder (or more, if you like it extra fishy tasting)

1/3 cup starch (corn, tapioca, arrowroot – whatever you have on hand)

Chop the yuba coarsely, then place in your food processor and pulse until it reaches a flaky consistency. Don’t over-process or it’ll be mushy. Scrape down the sides frequently and make sure it’s processing evenly. Transfer this into a mixing bowl and stir in the oil. Add in the remaining ingredients and use your clean hands to mash it all together so that it’s completely mixed.

Lightly oil the bottom of your steamer basket. It only just occurred to me that most people won’t have this kind of steamer. It’s an electric dealie we got from collecting grocery store shopping points. I think you could probably use a bamboo steamer but if you’re stuck with one of those ones that fits inside a regular pot, you may want to use the extra yuba sheets to try and wrap your phish mixture up into little pockets instead of lining the bottom of the steamer with them. Anyway. If you do happen to have a steamer like mine, lightly oil the inside of the basket, then lay the extra yuba sheets on top of this. If you’re not using extra yuba sheets, you can skip oiling the basket and just layer it with some parchment or foil, which you will have to oil before adding the phish mix.

Once you’ve got that whole thing sorted out, scoop the fish mix onto the liner you’ve chosen. Spread it out evenly and press it down to compact it well – mine was about an inch, inch and a half thick. Cover and steam for about 45 minutes. Remove the entire basket from the steamer and let cool to room temp. Then put it in the fridge or freezer for at least four hours or overnight.

After it’s completely cooled, you can cut it up any way you like. I cut it into 8 generously sized Fauxlet-o-Phish patties. You could cut it into fingers to make phish sticks, or you can shred it up and use it in phish cakes, or phish balls, or how about yubaphish salad sammiches?

Look inside…

That’s what I’m talkin’ about.

Hello everyone. It’s been a while. I am happy to say that I feel like I am back on the cooking track after a couple of months of floundering due to health issues. I had a procedure that should take care of the worst of my symptoms, and while I’m still slowly recovering, the recovery is progressing as it should and I am feeling a little better every day. So let’s talk about delicious, vegan food here again, shall we?

First, look at this BUCKET of guacamole.

This right here is almost exactly 3 kilograms (6.6 lbs) of homemade guacamole. We know this because we actually weighed it before digging in. Did I make this for a party or gathering of some sort? No. I made this because we were gifted practically an entire case of ripe avocados and my family and I are guacamole maniacs. The first night of this bowl’s existence we (the four of us) ate close to half of it in bean & Daiya “cheese” wraps while we watched the movie about Gandhi’s life. Yes, there was something oddly shameful about sitting there watching this amazing man starve himself in the name of human rights while we were cramming as much delicious, tangy, spicy, creamy guac into our gullets as we could; but it didn’t stop us. (The other half of the bowl was polished off over the course of the next few days.)

For Valentine’s day I generally make some sort of fancy dessert to share with the family. This year I was just one week post-op and didn’t have a real lot of energy or physical wherewithal to get jiggy with the sugar, but I did want to do something. A friend of mine keeps posting on FB about these cheesecake brownies she makes (non-vegan) and I just happened to have the ingredients on hand to try veganizing them, which is lucky because I hadn’t actually been to a store that carries Tofutti products in a couple of weeks. Anyway, I didn’t even bother looking at a non-vegan recipe for cheesecake brownies because I felt confident enough in my baking skills I could come up with something good. And I did!
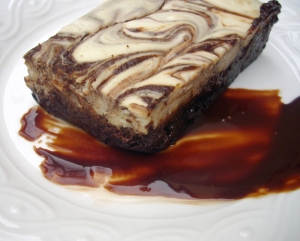
That’s what I was talkin’ about, y’all. A nice fudgey brownie bottom and a super luscious, creamy cheesecake-style topping.  What I really like about this recipe is you get that cheesecake satisfaction without having to drop a money-bomb at the natural foods store on the fake cream cheese. I mean, when I make a vegan cheesecake I end up using four or five tubs of the stuff and at $5 to $6 a container – well, that there is some bourgeoisie dessert, y’know what I’m saying? But these brownies only use 1 1/2 tubs – which leaves 1/2 a tub for you to enjoy on your bagels or celery sticks or whatnot.

Hey, why don’t you try making these yourself?

Vegan Cheesecake Brownies

Preheat your oven to 325 F. Prepare a 9″ x 13″ pan by lining it with parchment paper.

“Cheesecake” Topping

1 1/2 containers of Tofutti’s “Better Than Cream Cheese”

1 box of firm silken tofu, pureed until smooth (about 12 oz)

1/2 cup sugar

3 tbsp tapioca starch or arrowroot powder

2 tsp vanilla

1 tsp lemon zest (optional)

pinch salt

In a large mixing bowl, beat the Tofutti with the sugar until well-mixed. Add in the tofu and vanilla and mix. Add in the starch, zest (if using), and salt and beat to combine. Scrape this mixture into a separate bowl and set aside.

You can clean your mixing bowl now if you like, but I don’t bother. Instead I mix up the brownie mixture. (If I did the brownie mixture first, I’d end up with chocolate-coloured cheesecake topping, which isn’t what I want.)

Brownie Bottom

2 cups dark brown sugar

2/3 cup oil (canola, corn, sunflower, something light-tasting like that)

2 tsp vanilla

2 1/2 cups whole grain flour (I used spelt, because I love the taste and texture, but anything will do)

1 1/4 cups fair-trade, organic cocoa (I use Cocoa Camino brand)

1/2 tsp salt

up to 2/3 cup of non-dairy milk

Beat the sugar & oil together until well-combined. Add the vanilla and beat. Add the flour, cocoa and salt and begin mixing on low speed. Once that’s incorporated, start adding the non-dairy milk a little at a time. This is where you have to use your judgment. The final consistency of the batter should be somewhere between a cookie dough and a cake batter. You shouldn’t be able to pour it out of the bowl, but it should be wet enough that it will slowly spread out when plopped into the pan. Once you’ve got it the right consistency, scoop the brownie batter into the prepared pan, reserving about 1/3 of a cup. Use a spatula to spread and pat the brownie batter out into the corners and get it nice and even along the top.

Next smooth the “cheesecake” topping over the brownie bottom, using a clean spatula to get it into the corners and spread it out evenly. Finally, take a butterknife and plop the 1/3 of a cup of reserved brownie batter into the cheesecake topping. Use the knife to create streaks, swirls and stripes of chocolatey goodness through the creamy whiteness of the cheesecake topping.

Slide this into the pre-heated oven and bake for 45 – 55 minutes. The sides should look firm and dry but the middle should still seem a bit jiggly (don’t bother with a toothpick test on these babies). Turn the heat off the oven, crack the oven door open a bit, and let the brownies cool to the touch. Remove them from the oven and refrigerate for a few hours or overnight. Once they are completely chilled, you can use the parchment to lift the entire batch out of the pan and cut them into appropriately-sized bars. (I’ll leave it up to you to determine what an appropriately-sized bar is.)

Yum, right? We vegans are so deprived.

Next up….warm, soft, delicious, freshly-baked “cheese” and onion bread.
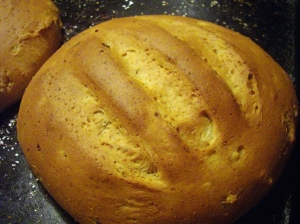
When I have the energy, I just love making bread by hand. There is something so meditative about it and the feeling of accomplishment, when the bread rises as it should and bakes up into something so soft and warm and delicious is arguably unmatched. The really nice thing about baking your own bread is you can flavour it and shape it anyway you like. Last night I was planning to make something with these giant beets I  had lingering in the bottom drawer of the fridge. Normally I would make a borscht – it’s a favourite soup around here – and so when I still felt like I was gonna do that I realized a nice, freshly baked bread would complete the meal perfectly. Of course, I changed my mind about the borscht, but not before I’d already started on making the bread. Anyway, here’s the recipe.

Vegan “Cheese” and Onion Bread

This is a fairly quick-rising bread – you’ll be savouring it within a couple of hours of  mixing the first few ingredients together.

This recipe yields one large loaf, but I usually double it because it goes so fast and makes excellent toast and sandwiches the next day.

3 – 4 cups whole grain flour

1/2 cup nutritional yeast (this is, in fact, optional – but really brings out the ‘cheesy’ flavours if you do use it)

1 tbsp dry, active yeast

2 tbsp dry sweetener

1 tbsp dried parsley flakes

1 tsp garlic powder

1 tsp cayenne pepper

1/2 tsp salt

3/4 cup warm water

4 tbsp olive oil

1 tbsp apple cider vinegar

1 cup finely chopped white or yellow onion

1 bag (227 g) Daiya cheddar-style shreds (or other vegan “cheese”)

Mix 1 cup of the flour with both the yeasts, the sugar, the parsley, garlic powder, cayenne, and salt.  In a seperate bowl, whisk the water with the olive oil and vinegar. Add this to the flour/yeast/spice mixture and stir with a wooden spoon to make a slurry. Let this sit for about 15 minutes to allow the  yeast to activate.

Next, stir in the chopped onion and shredded vegan “cheese”.  Then begin adding the rest of the flour, first stirring with the wooden spoon, then switching to your (clean) hands once it gets harder to mix. As soon as the dough reaches an earlobe-like consistency, turn it onto a wooden board and knead it for at least five minutes, maybe more like ten. This is the part where you sing songs and/or meditate and get all zen thinking about the simple pleasures in life.

Transfer the kneaded lump of dough to a lightly oiled bowl and cover with a clean dishtowel. Let rise for about 30 minutes. Take it out of the bowl and knead it a few times, then shape it into a loaf on a baking sheet, or put into one large or two smaller loaf pans. Cover and let rise another 45 minutes to an hour, or until it’s nearly doubled in size.

Preheat your oven to 350F and bake your bread for 25 – 30 minutes, until it’s golden and sounds hollow when you tap it. Let stand for ten minutes before slicing, even though I know that’s hard.

So, if I didn’t serve this scrumptious, savory, warm fluffy spelt loaf with borscht, what DID I end up serving it with? Well, I was in the mood for roasted beets, see? But roasted beets and bread don’t a meal make; that’s more like two side dishes than a main course. So I thought and thought  about how I could incorporate the beets into a main dish without making them a soup or salad, and then it hit me. I could try stuffing them!
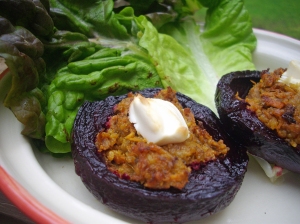
Oh hell, yes.

Sexy Stuffed Beets

Plump and pink and full of it. Just like this vegan food blogger.

6 medium- large beets, whole and unpeeled

1/2 cup balsamic vinegar

1 onion, peeled and finely chopped (about 2 cups)

4 large carrots, coarsely grated

1 cup coarsely ground walnuts (I actually used raw sunflower seeds because I realized at the last minute I was out of walnuts)

1 cup minced fresh mushrooms

1/3 cup nutritional yeast (optional, but really. It adds so much. Don’t skip it if you can help it).

4 cloves garlic, minced

2 tbsp apple cider vinegar

1 tbsp smoked paprika

2 tsp dry, rubbed sage

salt and black pepper to taste

1/3 cup vegan “cream cheese” or “sour cream” to garnish (optional)
Scrub your beets. Bring a huge stock pot of water to a full boil. Drop the whole, unpeeled beets into the boiling water and let them burble away for 45 minutes to an hour, or until a sharp knife can slide into the side of one with little to no resistance. Drain them, then fill the pot with cold water and add them back in. Let the sit in the cold water while you prepare the filling.

Preheat the oven to 450F.

In a large skillet, heat a couple of tablespoons of olive oil. Add the onions and saute for a few minutes to soften. Add in the carrots and mushrooms and cook, stirring occassionally, for a few more minutes. Add the garlic, vinegar and all the seasonings and mix well. Stir in the ground nuts and remove the pan from the heat.

Once the beets are cool enough to handle, rub off their skins and cut off their tops and tails. Cut them in half . (Because beets can vary so much in size and shape, I’ll let you decide which way to halve them – lengthwise or widthwise. Basically you want to cut them in whatever way will maximize the cup-shape you want in order to stuff them.) Use a soup spoon or melon baller to hollow out the beet halves, leaving at least an inch of beet flesh all around the sides and bottoms. Reserve the flesh you remove to be used in other recipes*.

Once all the halves are hollowed out, place the them in a well-oiled baking dish. Sprinkle them generously with the balsamic vinegar and a bit of salt and pepper. Put them in the hot oven and let them roast for about 10 minutes. Turn them over and roast another 5 minutes. Remove them from the oven and reduce the oven temp to 375. Turn the beet halves back to cut-side up, and fill with the stuffing mixture. Top each of them with a dab of vegan “cream cheese” or “sour cream” and then put them in the oven to bake just until they’re hot all the way through – about 15 – 20 minutes.

Serve on a bed of dressed or undressed greens, with a side of that freshly baked “cheesy” onion bread and you’ll be sitting in the catbird seat.

Until next time, my little puddings.

*I put the beet flesh into a container with a little oil and more balsamic vinegar and salt and let them marinate in the fridge. These are really nice just on their own or tossed with a big green salad.
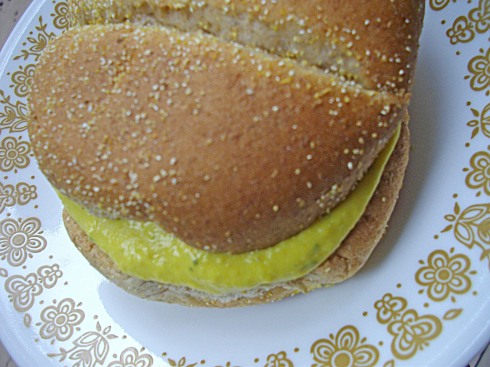
 

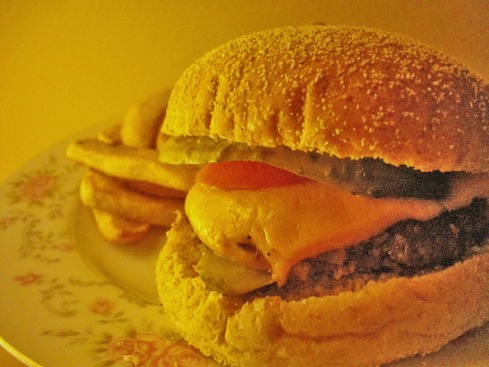
Not much to write tonight; I’m still struggling with whatever this health issue is. My kids asked me, around 5pm, if there was anything they could do to help get dinner ready today. (They volunteered! I got a little verklempt! I’m doing something right!). I said they could make some oven fries and fry up some of the hippy cake patties I had frozen the last time I made them, for burgers.

Everything's homemade but the bun and the "cheese" (which is Daiya)

Look at the beautiful job they did, working together. They’re 13 and 9 years old. I love my kids; they have a great, close relationship and barely ever have any conflict. It’s pretty great around here, I’m not gonna lie. Proud mama bear, with a full belly.

I probably overdid it with this meal tonight. I tend to get frustrated when I don’t feel well enough to prepare a proper meal. I like my own cooking. I am not a fan of ‘fast food’. And because I had so many parts of this meal already prepared (pre-cooked, frozen chickpeas; storebought curry paste; frozen cooked spinach; frozen naan breads – all from meals past) I figured it wouldn’t be a big deal. But I guess I take how much effort I put into our meals for granted when I’m feeling well, because this took a lot out of me. So be forewarned. If you’re thinking of replicating this dinner, set aside a couple of hours to prepare it; especially if you’re doing it all from scratch.

The recipes I’ve posted elsewhere and will link to them under each photo.

Chana Vindaloo (Spicy Chickpeas) on Brown Basmati

Recipe.

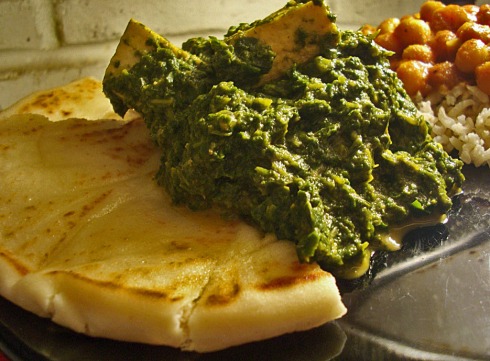
Vegan Palak Tofu-"Paneer" with Naan

Recipe.

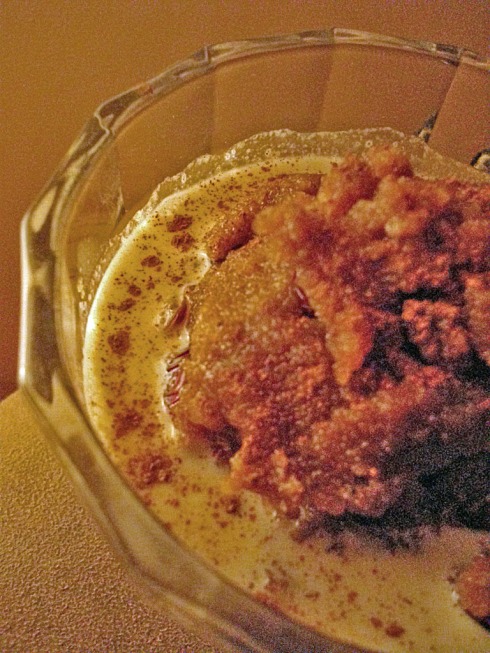
Halwah / Halavah (Steamed Farina Pudding)

Recipe.


Oh, I hope I haven’t been dropped from the Vegan Mofo list. I am so sorry for my absence. I had a medical emergency last Thursday (it was all very exciting with being rushed to the ER and all) and I was put on some heavy duty meds that have made me very sluggish and nauseated. This has meant I haven’t been doing much food prep. Remember how I was talking about making extra servings of all our meals and freezing them? These sorts of weeks are why I do that. So the family can remain fed even if I cannot do real cooking. I will say that over the weekend my  husband took over dinner prep in a very excellent way. He made roasted vegetables on polenta, and french bread pizza. (The other nights he reheated leftovers). Everything has gone smoothly. And while I’m still not 100% (and we’re still waiting on test results to find out what’s going on with my innards), I am on lower doses of the accursed meds (which are actually doing what they’re supposed to) and wanna start cooking dinner again, at least; if not in my usual elaborate manner.

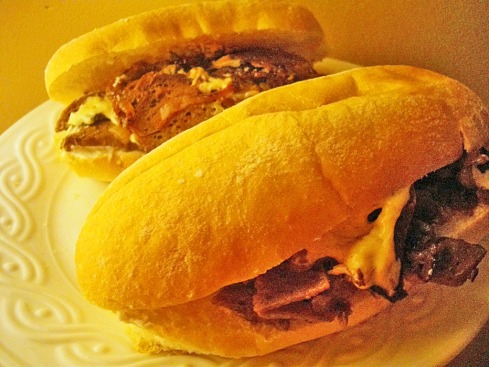
So, last night I pulled out the rest of the seitan “roast” I’d made last week and shaved it nice and thin with my cheap-y mandolin slicer. I caramelized some onions in a skillet with some olive oil, added a few spicy pickled peppers and the seitan, and fried it all around for a few minutes to get it nice and hot and crispy around the edges. Then I added some generous sprinkles of Daiya (Italian-style), turned the heat off the skillet, covered it, and let it rest for five minutes to let the “cheese” really melt. In the meanwhile I split a couple of soft Italian rolls and spread one side with garlick’d Vegenaise and the other with a sweet barbecue sauce. Once the “cheese” was all melty, I scooped generous helpings of the “steak” mixture into the prepared rolls, and served them steaming hot.

Drool-worthy Vegan Cheese Steak Subs

Not pictured are the oven-roasted  root veg’ sticks I made. I chopped some carrots, parsnips, potatoes and turnips into thin french-fry shapes, tossed em in oil, salt and pepper and roasted ’em at 425 F, stirring now and then, for about 30 minutes. I feel terribly guilty if my kids don’t get at least some kinda vegetable on their dinner plates every night.

By the by, if you don’t happen to have a delicious seitan roast just sitting around in your fridge waiting to be used in these subs, try using giant portabello (portobella? portobello? I have never been sure of the correct spelling) mushrooms, sliced real thin and marinated in olive oil, salt and pepper for half an hour or so. Not exactly the same but they will still have you vacationing in Tasty Town.


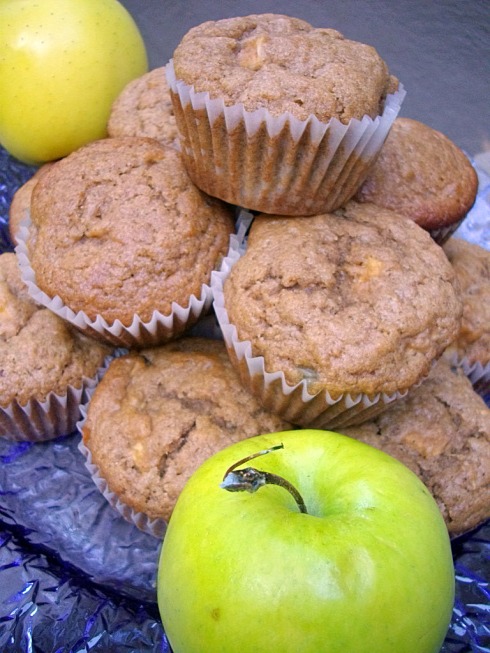
I had some bosc apples that weren’t going to last much longer. They’d been picked from an organic orchard on Cortes Island, BC back in late September. We were given an 8lb sack of them at that time and I had made some into apple sauce, and the rest were eaten fresh, but they were becoming increasingly mealy with every day that passed, so I decided it was time to get some baking done. I’m not an enormous fan of apples or apple-products but I do like a good apple cake or muffin. These fit that description to a “tee”. I even got a little fancy and added in some finely chopped crystalized ginger I’d had lurking in the dried fruit bin for almost a year, and put a little powdered ginger into the cake batter for good measure. The texture of these muffins can only be described as velvety and soft. Not moist, and not overly dense, either – which I’m attributing to the use of the soy yogurt. It’s not something I always have on hand (the kids have decided they don’t like it anymore, so I had to use up the last of what was in the fridge. However I would buy soy yogurt again and again if it meant we would be eating delicious soft rich muffins like these more often.


Wonderful, Appleful

Apple-Ginger Muffins

2 cups flour (I used half unbleached wheat, and half whole grain spelt)

1 cup dark brown sugar

1 1/2 tbsp baking powder

1 tbsp cinnamon

2 tsp ground ginger (or more, to taste)

1 tsp baking soda

1/2 tsp sea salt

1 cup plain or fruit soy yogurt (if it’s sweetened, you may wanna reduce the sugar used slightly)

2/3 cup non-dairy milk whisked with 1 tsp apple cider vinegar

1/3 cup vegetable oil

2 cups peeled and diced apples

1/2 cup finely chopped crystalized ginger

Preheat oven to 400F. Line 24 muffin tins with paper cups or prepare them with grease and flour.

In a large bowl, sift all the dry ingredients together and stir in the brown sugar until it’s well incorporated. In a seperate bowl or large measuring cup, whisk the soy yogurt, non-dairy milk + vinegar, and vegetable oil together until smooth. Make a well in the centre of the dry ingredients and add the liquid mixture. Stir until just mixed and there are still even some streaks of dry mix apparent. Fold in the chopped apples and crystalized ginger. Portion the batter into the prepared muffin tins (only fill each tin about half to two-thirds of the way to the top). I like to use an ice cream scoop for this job. Bake on the middle shelf for 25 – 30 minutes or until they test done. Let the pans cool on a wire rack for about 10 minutes before trying to remove the muffins. Enjoy warm with “butter”, “cream cheese” or your favourite preserves.

Yesterday I touched briefly on the topic of my kids’ school lunches and decided today I’d write a little more about them. Being vegan they face some unique challenges when it comes to packed lunches; living with a set of parents who prefer them to have whole foods as often as possible adds to those challenges. And put one of them in a school where there are two kids with known, severe peanut allergies and you’re probably wondering what on earth they could possibly pack every day that would be 1) delicious, 2) nutritionally adequate and 3) not get them too many funny looks from the other kids.

We’re still working on number 3. But we’ve got numbers 1 and 2 down okay.

Behold.


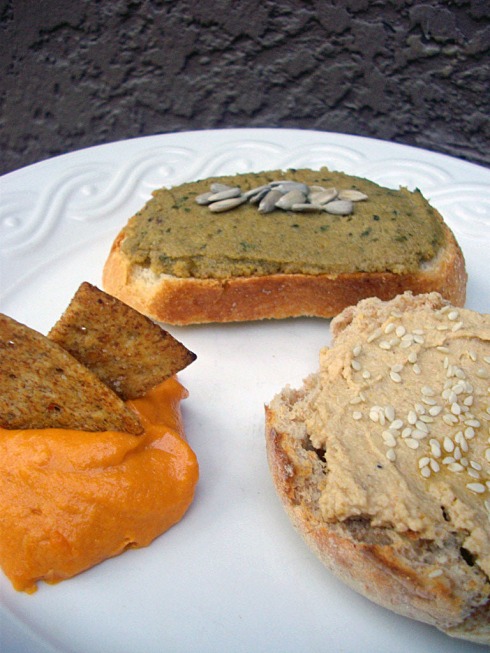
Left to Right: Yam Dip, Sunflower Pate, Toasted Sesame Hummus

Yep, my kids bring sandwiches filled with sunflower pate, whole wheat pitas smeared with toasted sesame hummus and yam dip with which to garnish their organic whole-grain crackers. Do they like these foods? Yup. Do they get teased about them? Sometimes, I imagine, though I have only heard of one incident where it got particularly heated. I just remember all the times I brought my homemade wholemeal bread sandwiches stuffed with soybean spread when I was a kid. Or my roasted chickpeas and raisins. I got made fun of too – but I still enjoyed the food and I’m glad my mom gave me a taste for wholesome stuff like that as a youngster. I realize now how much more delicious and less disgusting it is than balogne and processed cheese slices and Wagon Wheels. (Remember those?)

By the way, I insist you try making this yam dip yourself. Locals may recognize this as a staple on the menu offered by Foundation restaurant here in Vancouver. I boycott the joint now due to multiple instances of egregious customer service errors, and I don’t even miss it now that I can approximate their “Mingling Yams” here at home. You can do it too. Take 2 yams and roast ’em in their skins until they are nice and soft. Put ’em in the food processor with a matching number of garlic cloves. Add a healthy dollop of tahini, a few squeezes of fresh lemon juice, a pinch of salt and a glug or two of real maple syrup. Puree until completely and totally smooth like buttah. Eat with crackers, lavash bread, veggie sticks, corn chips, toasted pita, or a spoon.

Lest you get the wrong idea, my kids do occasionally get Tofurky deli slices and veggie dogs for lunches. Often they bring leftovers from our dinner the night before, depending on how complicated they might be to eat. They don’t always have as many fruits and veggies packed as I would perhaps like, either. I feel happy if I manage to get them to take one serving of these things every day. This has less to do with their willingness to eat them and more to do with the very minimal amount of time they are allotted to eat their lunches each day. My daughter gets 15 minutes before the kids are kicked outdoors – and they’re not allowed to bring food outside with them. My son does a little better in highschool now – it’s a 40 minute break and the kids can eat where they like.

Tomorrow is a day off here (lest we forget), so there are no lunches to pack, but I know what we’ll be having for lunch anyway.

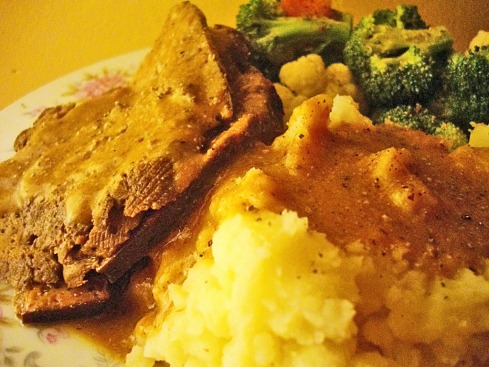
Slow-Cooked Seitan Roast Dinner with all the Trimmings

That was dinner tonight. Can you say “Open-faced Seitan Sandwiches on Toasted French Bread Au Jus”? I knew you could.

By the way, I have really, really been enjoying Vegan Mofo. As a first-timer I was feeling a little intimidated but it’s proving to be more fun and less work than I’d imagined. And I am really, really loving checking out my Google reader a couple of times and day and keeping my finger on the pulse of what everyone else is doing. We rock.


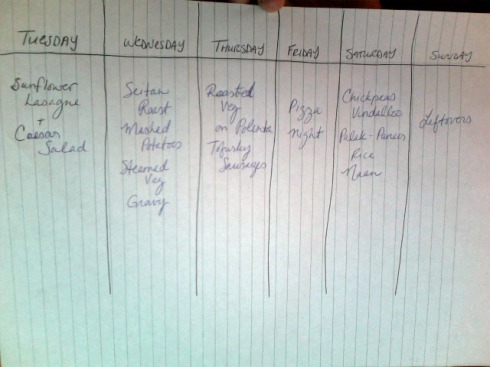
I did it! No lentils tonight, darlings. I had insomnia last night and made my menu plan at 5am…

Handwritten, cuz I'm old-school

A secret – I bought enough stuff to make double amounts of pretty much every meal, to be packaged and stored in the chest freezer for some future meal time when I’m feeling too tired/overwrought/lazy/busy/blah to actually cook. Or when we have a lean week money-wise and I have a hankering for meals gone by. I’m making lasagna while the sun shines, as they say.

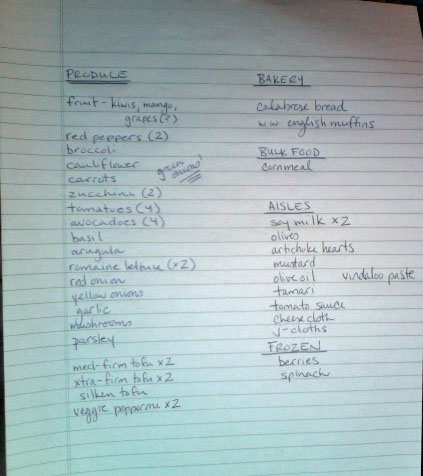
Then over my first hot cup of coffee at 6am, when I finally conceded that I would not be getting back to sleep, I wrote my grocery list…

Organized According to How the Grocery Store is Laid Out

I organize my list according to the grocery store’s layout. Tell me I’m not the only person that does this? Heh.

You may have noticed there isn’t anything on my meal plan for breakfasts or lunches. That’s because generally the kids eat toast or cereal with a smoothie in the mornings. With our Magic Bullet, they can pretty much be left to their own devices on school mornings. They also make their own lunches! This is an actual policy at their elementary school and part of the overall “never do for a child what she can do for herself” mandate (they go to a weirdo hippy school). Works for me! So I just make sure they have plenty of things to choose from every day and they get to have full autonomy over their lunches. Though I do look them over and make suggestions, such as – you need an apple and/or some carrot sticks. Perhaps I’ll talk more about school lunches and the challenges we’ve faced over the years in another entry.

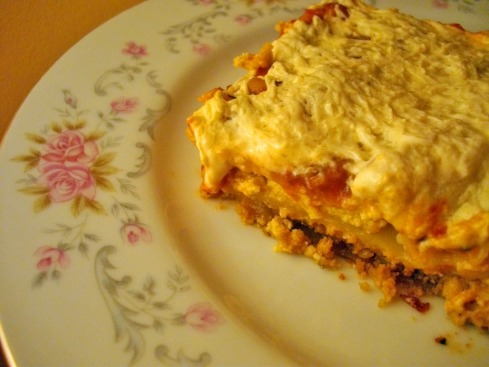
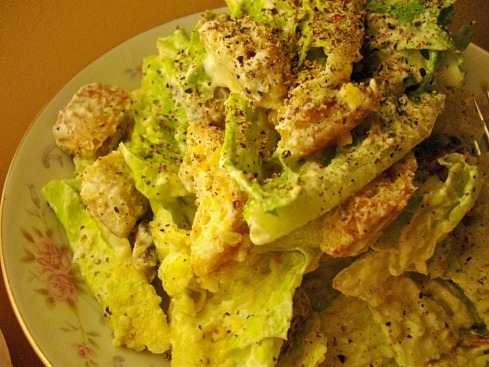
So, according to my meal plan, tonight’s dinner was my famous Sunflower Pate Lasagna and The Ultimate Vegan Caesar Salad. Is it bragging if it’s the truth?

Bake a layer of uncooked Sunflower Paté into your lasagne, instead of veggie "meat".

Homemade croutons are the key to a perfect Caesar Salad. Oh, and garlic.

I don’t understand people who seem to think vegans are deprived when it comes to food. I consistently make meals that strike all the same notes my non-vegan meals of yore did. Filling, hearty, savory, sweet, rich, with a ton of variety. The only time I’ve ever bored with my food is when the pantry is almost bare and I’m too lazy to go shopping to replenish it. Oh, and I am occassionally bored with the vegan restaurant options in my city. Vancouver is pretty good for choice, but we live far enough outside of the city proper to make a trip into town for a meal a bit daunting, especially on a weeknight. I try to look at it as a good thing: I am “forced” to cook at home more often than not, which is less expensive and often healthier. Yeah…that’s it.

My kids always know when I have neglected to make a meal plan for the week (and subsequently neglected to make my usual categorized, alphabetized and cross-indexed shopping list – or go shopping at all), because that’s the day that we have some sort of Exciting! Creative! Lentil dish. Note to new parents and/or new vegans (or hopefully new vegan parents) – always keep your pantry stocked with lentils. You have no idea how many times they will save your ass; especially if you start your kids eating them from a young age and you end up with a couple of total weirdo youngsters who actually gobble them up in all their various incarnations, with gusto. My kids are crazy for lentil soup, lentil stew, lentil pot pie, lentil dahl, lentil balls, lentil salad…you name it. They just love lentils. So trust me on this one. Buy lentils. When it looks like you might be running low, buy more. They are inexpensive, protein-rich, and cook faster than beans with no soaking required. That’s my pro tip for tonight.

At 5pm tonight I had to finally acknowledge that the whining had begun and I hadn’t the faintest idea what I was going to do to quell it. I did what I always do in that situation, Pinky – tried to make something out of lentils. I am very lucky that a dear friend of mine recently sent me a fresh jar of Arabian Baharat spice mix, from my favourite spice-mixin’ company Monsoon Coast. If you aren’t so lucky as to have a friend like that, or access to your own Arabian baharat spice mix that has been pre-mixed and sold commercially, I suggest you try making your own and keep it on hand. In my opinion, there is nothing better when you’re stumped on what to make out of your lentils. Here’s a selection of good looking recipes for grinding up your own. I’m not that industrious (read: mostly lazy) so they’re offered untested, but do let me know how it goes.

Before I was entirely clear on what I was doing I put about 2 cups of brown lentils in a pot, and filled it up with water til they were covered with it by about 2 inches. I set it on to boil. I then set about hunting down some easily cooked grain like rice or couscous. No such luck. All I had in the cupboard was flour and cornmeal. I had a vague recollection of making some delicious and tender cornmeal dumplings a while back, that I’d let simmer away in a giant vat of French-style tomato, herb and lentil soup. I figured I could do the same kind of thing but cook the dumplings in some boiling, salted water, and mix them into the lentils near the end of cooking.

I mixed equal parts cornmeal and flour, added some baking powder, salt, cumin (another great flavour for lentils) and smoked paprika. I then whisked in some soy milk and water to make a fairly thick batter. With the water at a high boil, I dropped scant teaspoons of this mixture into it, working quickly. Then I turned the heat down to medium-low, covered the pot, and let them boil merrily away in there for about 15 minutes. Don’t cook your dumplings any longer than that as they’ll go from firm-yet-tender to a disintegrating mass of mush in fairly short order. And while I’m on the subject don’t overcook your lentils, either – they should be al dente when you remove them from the heat and drain them. Nobody likes a mushy lentil and since I’d decided at this point to make a kind of spiced stir-fry out of them and the dumplings I wanted them to retain their shape and stay slightly toothsome.

The beauty of this kind of cooking is you just work with what you’ve got. I could have put any number of vegetables into this dish, had I actually planned for it and go shopping to accomodate it. As it was, all I had in my fridge tonight was a handful of carrots, the last few stalks of a bunch of celery, some apples that needed to be cooked to be considered edible. I also had a couple of onions and a few bulbs of garlic. Because I like to have more than one homogenous green lump of mush on my plate at a meal I decided I’d roast the carrots, whole; and but the rest of what was lingering (some might say MA-lingering) in the fridge into the Arabian-style lentil-and-dumpling fry-up. I chopped everything up kinda chunky. I heated a humungo skillet over medium and added some oil. I tossed all the veg and apples in and sauteed them all around until they got kinda tender and aromatic. Then I heaped a few generous tablespoons of the Arabian baharat into the pan, along with some sea salt, and stirred it all together. Then I added in the drained lentils, strained dumplings and very carefully mixed it all around until the seasoned veg & fruit were all incorporated. Add in a little lemon zest and juice, and voila….dinner.

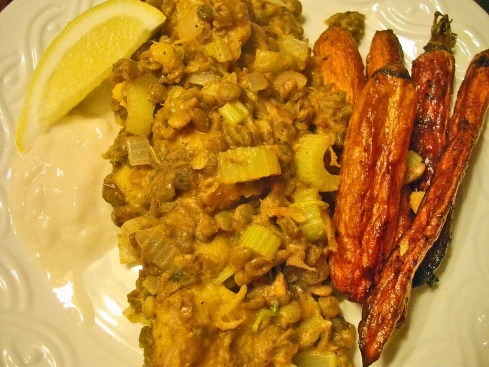
Baharat-Spiced Lentils with Cumin-Cornmeal Dumplings, Roasted Carrots, a blob of soy yogurt & a lemon wedge cuz we's fancy.

Yeah, so. This meal isn’t winning me any awards from Gourmet Foodz Unlimited but both my kids had second helpings, and frankly, those are usually the highest accolades I can hope to achieve since deciding to breed. Plus, you know. Kids voluntarily eating lentils and vegetables. Honestly? That’s gotta be worth a plaque or certificate or something.

Oh – were you wondering how to roast a carrot? Preheat oven to 425F. Peel (or don’t) all the carrots (of similar thicknesses) you think you can eat. Put them on a roasting sheet. Drizzle them with oil. Sprinkle with salt & pepper. Roast for 25 – 35 minutes or until they look kinda like that picture. Nom. Feel the vitamin A seep into your eyeballs. Be happy.

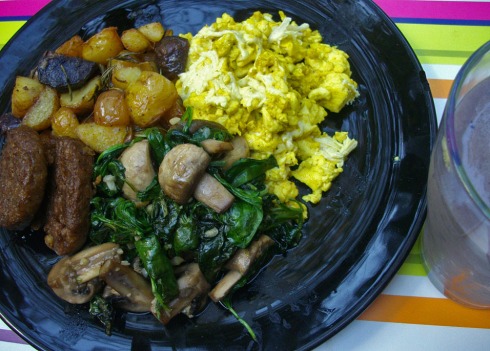
Clockwise from the top: Cheezy Tofu Scramble, Banana-Berry Smoothie, Sauteed Spinach, Garlic & Mushrooms, Veggie Sausage Patties, Roasted Rosemary Nugget Taters

I’ll let the photo speak for itself, but I do just wanna say – I make the best goddamned scrambled tofu on Earth. Yes I do.

O-bla-di O-bla-da, Life Goes On

April 2024
S M T W T F S
 123456
78910111213
14151617181920
21222324252627
282930